To begin, you need to figure out what kind of pattern you're laying - square, brick (staggered) or diagonal. Because I'm using 12"x24" tiles (more on those pros and cons later) I went with a brick pattern. I've got the pattern, now I need to work on the layout. Normally you'd find the center of the long side of the room and snap a chalk line then do the same on the short side of the room to get the center. If there's a doorway, you'd also get a centerline from that and then figure out how to lay the tiles so you don't end up with any terrible (thin) cuts of tiles at the ends (as best as possible). It was pretty much the same for me, except I had to deal with the lovely bow-front of my bathtub. I didn't want little pieces to cut curves into, so I decided that I'd use the tub as my starting point. Here you can see the initial layout:

Note the chalk line on the right of the tiles (remember folks, you can enlarge these pictures). My first line was the center of the door and the tiles are currently covering it. The visible line is the one I used to set everything from. It basically let me use a full width tile for the starting point of the tub cuts. BTW, DIY tip - use hair spray on your chalk lines to get them from disappearing. It really does work. And measure about 80 times to get the line right - you don't want to finish your tiling and wonder why everything is veering to one side. Not good. Even Helen knows that. She can't really tell if it's happened and has no idea how to fix it, but she's starting to win me over with the grout thing.
In this picture I've started laying out part of a second row of tile to get the brick pattern right. I want the grout lines of one row to hit the exact center of the tiles in the next row. I also want the first row of tile to be as close to a full tile as possible taking into account the width of the threshold that will later be put in the doorway (they will be full 5" threshold to match the rest in the house):

It took a lot of trial and error to get it just right and get the measurements to the partial tiles that will be at the end of the run. One length for rows that start with a full tile, another for those that start with half tiles. Lots of fun. No swearing at all. Nope.
After a couple hours of measuring, checking and testing I was ready to go. I had the sense to cut the curved pieces first rather than cut as I needed because it takes a while to cut a nice smooth curve in a 24" tile. I used a cheap tile saw to do the work and it did the job admirably although I will happily smash it to little pieces when I'm all done. You see it's one of those bench top models with the blade coming up through the top like a table saw, rather than from above like a chop saw. There is a reason why they cheap tile saws are built that way - they spray a ridiculous amount of water back at you. Oh sure there's a guard to use, but you can't see anything when it's down. I felt like I was in Das Boot at some points. Anyway, it did work as you can see from this dry fit (note the ever important cardboard template sitting on the tub used to cut the Ditra to shape and the tile):

And yes, the closet really is a horrible colour - but it's not staying. I've got some shelves and an access panel to put in so the closet will get finished after the main work. And it was pointed out to me that I should have probably put my door trim in after the tile, but the simple matter of fact was that it was originally done this way and I just did it the same way. Once it's grouted and the trim is in, it won't show. After much fun and no swearing (really, you don't believe me?) the tile was down and then the following day grouted. I decided in the end not to use Helen's services, not because of any prejudice or her inability to return my phone calls or text messages because she's been dead for quite some time now and her whole participation in this event is clearly a complete and utter delusion on my part brought on my the stress of this never ending reno. Sorry, I digress, the grout:


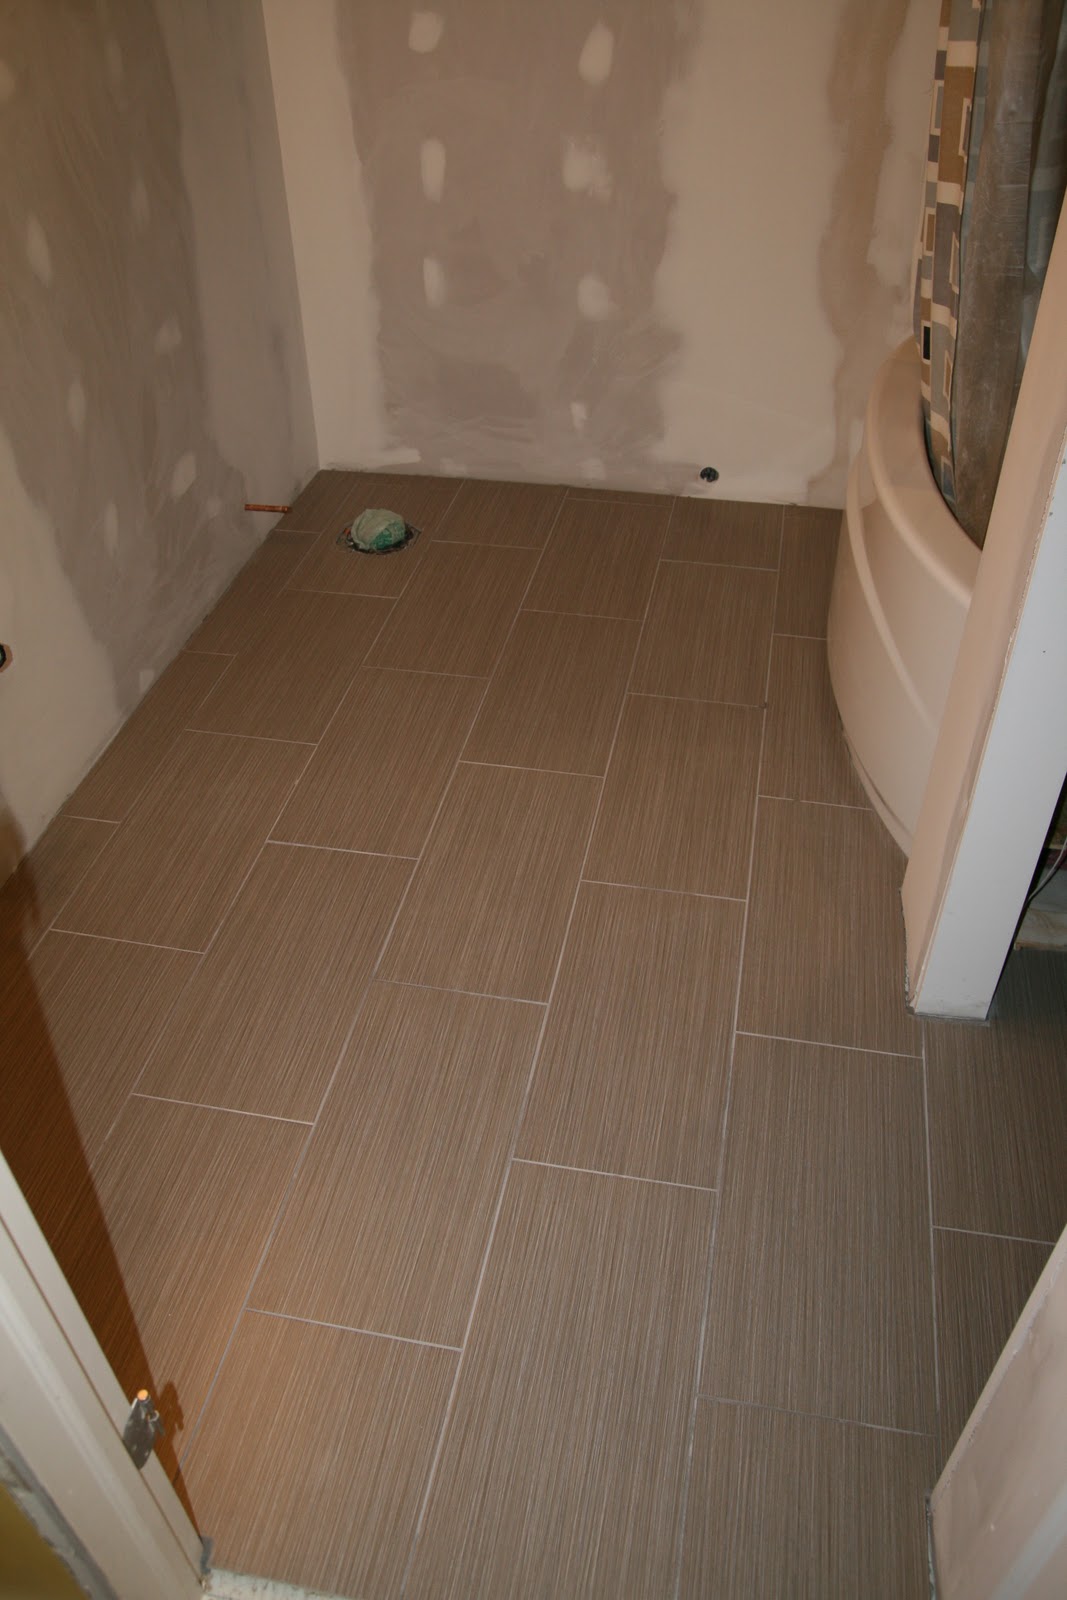
You will notice in the last picture that I even managed to cut out the opening for the main drain pipe. That was actually easier than I thought. I measured it's location on the tile, made a square, then an octagon, and finally cut it all out with a diamond blade on my angle grinder. It was actually ridiculously easy. Just like laying the tile. Honest. There were no issues at all. Well not really. I mean not anything major. Nothing that would make me swear. Okay, fine. If the paint were on the walls at this point it would have peeled off while I was laying tile.
See, there's the issue. I like the 12"x24" tiles and I don't regret using them and they certainly cover a lot of floor as you lay them. But they have a certain "cost" associated with them. They can be a bitch to level. At two feet long, when you press one end down to get it level with the other tile (when the edges of tiles aren't even it's called lippage and best case it's ugly, worst case you stub your toe or trip) the other end pops up something fierce. To help get it right you need lots of mortar. That was another issue actually. Big tiles require more mortar than you'd think. Firstly, they need a bigger trowel size. I had to use 1/2" x 1/2" notched trowel AND I needed to back butter the tiles too (a slathering of mortar on the back of the tile to make sure there is good adhesion and support). Think about it, in the same way it's easier to snap a long piece of wood versus a short one, it's a lot easier to break big tiles than small ones. Don't have them fully supported with mortar and look out. I burned through 2 1/2 bags of mortar for that little floor.
All that aside, it looks good and it's let me move on to the next phase of this never ending story - painting. And that will be in my next post...which since I already have most of the painting done and pictures taken, might actually get done in a reasonable amount of time...maybe...